Friday, August 7, 2015

RE-VEAL: MOM'S BIG 80TH BIRTHDAY BASH

MOM'S 80TH BIRTHDAY BASH
It's been years since we did our planning post on MOM'S 80TH USING MEMORY DECOR and in the interim, I've posted about my Father-in-Law's 80th Birthday Party HERE  and we covered several other special events Reba did.  This particular party just had a LOT of material to cover, and maybe the post was getting too ambitious (I tried to add a video clip from the party CD before realizing it wasn't needed) so here, finally, is our mom's party post.

THE INVITATION.  Reba came up with the idea of a pull out invitation and our sister, Elsa, & I loved the idea.  We found some great photos to capture our mom's life and Reba made an adorable poem for the invitation.  The cover photo of our mom as a child was captioned, "This Baby" and it opened to a picture of her in her 20s "Grew Up To Be This Lady", the facing page had a photo of our parent's wedding captioned "Who Married This Man", the pages opened to a wide shot of a family portrait captioned "And Had This Family" and the last photo was a recent portrait captioned "Now This Baby is 80!" 

ANOTHER  VIEW OF THE INVITATION.  If you want to do this type of invitation, I will admit it was a bit of a project. We had to edit the photos to make them high quality enough for the invitation, and change their size. We even had to photoshop in our nephew who missed the last family portrait to include everyone.  The photoshop worked great and no one noticed the difference, but it was another step.  We also had to try out different fonts and we didn't do this ourselves. Reba had a local advertising company do the layout, do mockups and print the final invitations.  Even so, there were multiple drafts before the invitation was just right.  I know there are tons of talented DIY crafters who could make this invitation, but I want to warn you the multiple pages do make it harder than a typical pull out.  I will say the guests RAVED about the invitation.  We got several phone calls of admiration and my mother thought it was very clever.  So, for us, it was worth the effort and time. 
THE GUEST OF HONOR TABLE.  The color scheme for the party was cobalt blue and yellow.  We discussed selecting it HERE This color combination seemed fitting for several reasons.  They were the colors our mom used for her 2 local election campaigns and then, we adopted them to advertise our family business.  Additionally, my mother's favorite flowers are yellow roses and we live in Texas where outstanding women are sometimes called "yellow roses of Texas."  It just seemed right.  The rented tablecloths and napkins were blue. The silverware was provided by the caterer. The plate chargers were gold.  For this table, Reba used our mom's blue and gold china, Noritake Vienna & her own cobalt blue goblets.   Small cobalt blue votive candle holders were placed around the yellow rose centerpiece.  The crystal vase for the centerpiece was also Reba's.   At each place setting, a cupcake with a yellow rose was placed.  The tables cards were named after streets where our mother lived or from neighborhood streets.  The table & gold chairs were rented locally.
ANOTHER VIEW.  In this photo, you can see Reba left a Proust Questionnaire for each guest to give them an activity while they waited. If you'd like a similar activity, I'd suggest a questionnaire about the honoree's life and make it a whole group game.   
SEAT OF HONOR.  The caterer suggested a bouquet of flowers and a sash to distinguish our mom's chair and I thought it was a fantastic idea. 

THE GUEST TABLES.  These had the same tablecloths, napkins, flatware, plate chargers, votive candle holders & yellow rose cupcakes as the guest of honor's table.   White scalloped plates and clear goblets from the caterer were used instead of family china & goblets and the centerpieces had yellow lillies instead of roses.

THE MEAL.  We served salad, ceviche and Mexican food for dinner.  We knew we were going to  have Mariachis play at the end, so we thought it was a good choice that most everyone would like.


RECEPTION TABLE. When guests arrived, they were directed to this table to find their place cards and table assignment.  In lieu of gifts, we asked guests to write a note to our mother.  Reba brought a blue & white ceramic bowl on a gold base for the guests to leave their notes and placed one of our mother's blue & white ceramic elephants beside it.  Our mother LOVES elephants which she has collected for good luck my whole life. It was a small touch, but the party guests were my mother's closest friends and they would likely know the personal significance of the elephant.  I thought it was particularly clever of Reba to do that.  Beside the bowl, I placed our mother's initials decoupaged in black and white photos.

MEMORY DECOR PROJECT #1. I made a collage in the shape my mom's age.  3 years ago when we had the party, this was still a pretty new idea.  I picked great black & white photos and got to it. I used 2 large gold frames & backed them in blue velvet.   My mom and her guests enjoyed seeing looking over her old photos.
WE GONNA NEED A BIGGER BOWL & MEMORY DECOR PROJECT #2.   We didn't expect so many notes, but guests wrote the most AMAZING letters to my mom.  For several days after the party, my mom was still reading them and asking us to let her read passages aloud to us.  Then, my mother would call people to thank them for what they had written and several of these phone calls ended in joyful tears.  It really extended the afterglow of the celebration.  Months later, my mom came upon her stash of letters and began reading through them again and then, stopping to talk to me about whatever was written.  This has happened at least 3 times with the two of us since the party and I don't even live in the same town anymore.  She truly treasures them.  The decoupaged letters are my mom's initials and some of her friends just call her by them.   I was expecting them to stand up, but the balance seemed off once they were decoupaged so I had to lay them on the table.  In hindsight, I probably would have chosen bigger letters to make a bigger impact or skipped this project. 

FINDING THEIR SEAT. Our sister, Elsa, helped my mom's friends find their place cards.  It wasn't a big party. It was mostly close family and friends, but my mom wanted to include a few more people who help make her life special and we were lucky quite a few were able to join us. She had the ladies who have done her hair and nails for many years, her physical therapist, priests who have moved away, friends from grade school and cousins she hadn't seen in many years all there for the special night.
PRAYER BEFORE THE DINNER.
VIDEO MESSAGES.  While guests were finishing dinner, our sister, Elsa, introduced a special video we had made for the party.  My father, my siblings, our other halves, our kids and a few close friends all sat for interviews with a videographer before the party.  We were asked for a funny story, a heartfelt story and a birthday message for our mother.  There was a LOT of footage with all those people, so only the funny messages were used.  All the raw footage was saved on a CD for my mom to enjoy later.  It was funny and highly emotional to see what we all had to say about Mom.  For my father-in-law's 80th birthday party, my niece made a music video with photos and I thought that added a lot to the party.  If you're planning a big special party, I would strongly suggest trying to make something like this.  It was definitely a highlight of the night.  I saw both my parents wiping their eyes while watching it.  For our father's birthday later that year, we made him a tribute video as well. 
THE TOAST.  After the video, our sister, Elsa, lead the toast to our mother.
THE LADY OF THE  HOUR SPEAKS.  After the toast, my mom thanked everyone for attending and commented about how blessed she has been.  

OUR PARENTS SMILING AT THE PARTY.  They will be married 60 YEARS this December!
Blowing out the candles on the birthday cake with the grandkids and a surprise mariachi band.  The cake was a large white sheet cake with yellow roses and blue ribbon icing.  With all the other details to cover, the cake was kept pretty straightforward. 


LOTS OF PICTURE TAKING WITH SPECIAL GUESTS.

LOTS AND LOTS OF PICTURE TAKING.  LOL.

ENDING ON A HAPPY NOTE.  As the last guests left, our family stayed to take photos.  Reba was writing a check to the bartenders when our other sister, Elsa, started a dancing line.  When the party was over, I told Reba she had done a great job.  Everything was as I hoped it would be. It was the wonderful 80th birthday party that our wonderful mom deserved.

WRITTEN BY ELDAROSE

Friday, February 13, 2015

RE-CEIVING GUESTS: A TEEN GIRL VALENTINE'S PARTY


THE RIGHT KIND OF FUN. I have a teenage daughter.  It's as scary as people claim.  Just as my daughter has to face the most challenging situations of her young life, I can sense my loss of influence with her and the increased importance of her friends' opinions. To avoid becoming a non-entity in her life and to get to know her friends better, I like to host teenage versions of playdates at our house.  I want to show her that your social life doesn't have to revolve around boys to be fun and to encourage her to invest in her friendships.  I strive to come up with activities the girls will think are "cool."  Left alone, the girls would all sit around on their cell phones lost in music videos, video games and emails instead of talking and interacting with each other. I've seen it way too often.  I was happy with our Valentine's party last weekend so I'm sharing it with you here. 

$2 CRAFT PROJECT. All the rectangular frames above, came from the Dollar Store.  I bought a couple pink and blue striped scrapbook pages and some pink ribbon on 50% sale.  Since I'm crafty, I already had navy blue and gold paint and some paper heart shaped doilies. The scrapbook pages each did multiple frames and hearts and the ribbon could have done more frames. The Love card is also from the Dollar Store. I just taped it to the page. Totaling up all the supplies, the finished frames were less than $2 each and I could have made many more so I consider them a good craft activity, but I  decided to go with glitter cups, a banner and baking this year.  Maybe I'll do this one with the girls next year.

JUST ANOTHER VIEW OF THE FRAMES

OMBRE GLITTER CUPS. So easy, so pretty.  A new trend on Pinterest is glitter cups.  You apply spray adhesive to plastic cups or champagne  bottles and then sprinkle glitter on it.  It adds sparkle and glitz to any celebration and it's super easy.  I've seen it done a lot with gold & pink glitter on champagne bottles or clear plastic champagne cups, but I decided to give the girls pink solo cups and give them a variety of glitter colors (blues & pink hues) to make ombre effects if they wanted since ombre is so in right now. You can see the girls started with red on the bottom and then chose lighter shades of glitter for each subsequent layer.


CREATIVE EXPRESSION.   I'm a very orderly crafter.  I like projects to come out picture perfect, but for a gathering like this, it's the creative expression that's important, so I let the girls go crazy with the glitter and do whatever they want.  No matter what they did, it looked pretty and festive. It was basically a fail-proof craft.  I had some glitter already, but FYI, Dollar Tree has small packets of 4 glitter colors as a set in different hues.  I picked up a few of those in pink and blue for this activity.

A YOUNG VIBE. I chose navy blue and bubble gum pink over traditional red and white to better fit the age range.  It started because I had pink chevron heart place mats, but I went with navy and white greek pattern material for the table cover since that is so in right now.  My daughter has a lot of pink in her room, so I brought out some poodle ornaments we got her years ago and a pink Eiffel tower to use as a centerpiece. Then, I added some hot pink balloons that I got at the dollar store. If I didn't have the place mats, I could have used pink butcher paper to make large pink hearts for each place setting. It was more about the bright colors than anything else. 
LE MENU.  This was an easy meal. I made heart shaped pasta they had at the grocery store with cheese sauce, a green salad, some bread from a Pillsbury roll and served pink lemonade.  Teen girls aren't expecting much for party food and this was cute and filling. Heart shaped pizzas was my back up plan.  After dinner, the girls baked their own cupcakes and cookies and they decorated them. Teen girls are old enough to bake without much supervision and many enjoy it.  Those who don't, can watch and visit with the rest.  Since I used mostly plastic and paper plates, cups, napkins and cutlery,  I hardly had any clean up.  I did like the pink plastic heart shaped bowls I found at the grocery store for $1 each on sale. I thought they made the table setting more festive.


PINK & BLUE BANNER.  I had blue and pink butcher block paper from a teacher's supply store and made a large banner. My daughter helped making a few extra hearts for the banner.  If the girls got bored, I was going to get them to do a few more for me.  I did give them some pink and blue crepe paper to decorate the banner and they made some streamers for it.  They thought it came out pretty so we took a picture.  Very inexpensive activity and it kept them off their cell phones. After dinner, they baked their cupcakes and played Just Dance so their cells pretty much stayed put away as I hoped they would.


ANOTHER VIEW OF THE BANNER.
KEY TO MY HEART.  When I put this card out as a display, I noticed the key theme and found an old key, spray painted it gold and put a ribbon on it to add to the display.  Afterwards, I realized this could be another craft for the girls. I have lots of old keys that don't go to anything.   I could have had the girls spray paint them gold and hung them from ribbon to make them into necklaces. I would be recycling. If I didn't have the keys, I could have used florist wire, shaped it into a heart and had the girls spray paint them to make them into pendants to go on ribbons to make necklaces.  I didn't need the activity this year, but I'm storing the idea away for next.

Hope you have a happy St. Valentine's Day!

WRITTEN BY ELDAROSE

FYI, SOME OLDER VALENTINE'S DAY POSTS

EASY ROMANCING YOUR SPOUSE IDEAS HERE

REBA'S ROMANTIC TABLE HERE

REBA'S ST. VALENTINE'S DAY LUNCH TABLE HERE

REBA'S 2012 ST. VALENTINE'S DAY TABLE HERE

Thursday, February 5, 2015

RE-cycling Holiday Decor: My Budget St. Valentine's Day Mantel


XMAS ORNAMENTS RECAST. I enjoy decorating for all the holidays, but it's a hobby that can easily get out of hand.  A great way to limit the decorations you buy, store and maintain is to find ones that can serve more than one holiday. The cherubs, above, are ornaments for our main Christmas tree. A dab of hot glue converts my ornaments into figurines. I can later peel the dried glue off easily without causing damage to either the mantel or the ornaments.  Cherub, red, pink or white ball ornaments or white dove/love bird ornaments can all pull double duty as Valentine's Day decor. For example, dump a bunch of red glass ornaments in a tray or a glass vase, add a few cupid picks and viola, a Valentine's Day arrangement.  I use cross Christmas tree ornaments for Easter decor, our deep green ball ornaments & ribbon for St. Patrick's Day and our gold, green & purple ball ornaments for Mardi Gras,  Not only do I get extra use out of my ornaments and save $$$, but it makes packing up all my Christmas decor in January less of a chore because there is less to pack away until next November! Double score!

Making a few holiday items go a long way. Here's my St. Valentine's Day Mantel. In addition to reusing angel & heart Christmas tree ornaments, I used framed old Valentine Day cards, a DIY red felt pomander and a few new purchases from the Dollar Store or the Dollar Section of Target to satisfy my holiday decorating urge for a bargain $6.
VISUAL POP.  To save $ and space, I shop around my home for things I already own that can be used in a holiday display versus buying new items.  Here, I originally considered using silver & porcelain heart jewelry boxes and crystal cherub and heart shaped figurines I already have. They are finer crafted, more elegant decorations than the ones I used, but I went with inexpensive bright red items believing the visual contrast with the deep blue walls would be more festive. To me, visual pop was more important and luckily there are all sorts of ways to bring in color easily & inexpensively to supplement other display items.
VERSATILE FRAMES.  I've found that a few ornate gold frames are a great decorating staple.  These ornate gold picture frames sometimes hold family photos, but in February, they display old Valentine's Day cards and in March & April, they hold pretty Spring holiday note cards.   They dress up anything they display. I like re-purposing old holiday cards this way because I get to enjoy them instead of sticking them into a memory box that won't be opened for years.   Party invitations framed and used as table decor would be another great use.  
SOMETHINGS OLD, NEW & MADE.   The red ribbons hanging in front of the mantel were bought at Michael's and Target for $1 each. The red glittery plastic plate was purchased at a local grocery store for $1 on clearance after Valentine's Day.  The gold hearts are both Christmas tree decorations.  I stuck one of the gold hearts on a floral tube I got from a floral bouquet and spray painted gold. I painted a piece of hard wire, threaded it thru the plastic tube and tied it to the heart ornament to make it stand upright on top of a felt pomander to create a topiary design.  The red felt pomander was a simple craft project. 
FELT ROSETTE POMANDER DIRECTIONS.  This is such an easy project and perfect for Valentine's Day.  Use an old CD to draw a circle on a piece of felt. Cut out the circle and then cut the circle into a spiral as shown above. Pinch the small end of the spiral and wrap the rest of the spiral around it to form a rosette. Do a bunch of rosettes and hot glue them to a form ball or to a wreath form to create a lovely Valentine's Day decoration.  It is so easy you can make a bunch while watching your favorite tv show and not miss a thing.  It's also an inexpensive craft since a sheet of felt costs about 25 cents and makes multiple rosettes.

Hope this entry may spark some shopping around your own inventory of holiday decor and mementos for creative repurposing. Remember - store less, use what you have more.

Written by Eldarose

Sunday, January 4, 2015

RE-Organizing: Sorry for Technical Problems

I FEEL LIKE THIS WAY TOO OFTEN WHEN I VISIT OUR BLOG.  I edited a post from November about All Saints' Day today and it unexpectedly went out via email to our subscribers. I have no idea why. Sorry for that. A few people have asked us why we haven't been updating our blog.  We have made some new posts, but Feedburner decided to stop delivering the updates back in the Spring so you would only know this by visiting the blog on the web.  I tried to fix the distribution problem several times before I discovered the program, Feedburner, is no longer being serviced so when it has a glitch, there is no one working to fix it.  Grrr. I found a few other programs to use to transfer our subscribers list and get updates going again, but then, I fell into the wormhole thinking about fixing our blog format, our url etc. before we changed to a new distribution system and the to-do list became really big.  It's like renovating an old house, once you start fixing things, the projects expand quickly.   We're working on it.  Sorry again for the oddly timed update. Hope everyone had a great holiday and is ready for a happy and healthy 2015!

WRITTEN BY ELDAROSE (Who wonders if Feedburner will deliver this or if it was a one time fluke.)

RE-Joicing: CELEBRATING ALL SAINTS' DAY & ALL SOULS' DAY WITH KIDS


OCTOBER FUN. For many kids, October is all about Halloween and even though I greatly enjoy Halloween myself, I want the kids in my religious education class to have wonderful associations with the Catholic holidays of All Saints' Day and All Souls' Day which also happen in October. For All Saints' Day every year, our religious education program has a parade in which the teachers lead students dressed up as saints all across the church campus as we sing along to "When the Saints Go Marching In."  I try for 100% participation, so I take some inflatable swords I bought for my daughter's PERCY JACKSON PARTY for the kids to carry and extra fabric to use as a cape or headdress for any students who forget to wear a costume.  I also make a shield with the theme of the day and have all the kids color it and sign it to lead our class group as part of God's "Army" in the parade.
ROSARY SWEETS.  October is also the month of the Rosary so this year, I  formed a rosary out of donut holes, twizzlers and M&Ms and placed a statue of St. Mary in the middle as a treat for the kids after the Saints' Parade.  I had seen the idea on Pinterest. It was a big hit. They couldn't take their eyes off of it and I was able to hold their attention as I went over all the elements of the rosary again.

MAKING DRESS UP EASY.  It's a lot easier to find a superhero costume than a saint's outfit and it's not a given kids (or their parents) will have a favorite saint to inspire a costume so for parents without the inclination or time to buy or make a costume, I've searched around online for EASY costume suggestions from home items to pass along to them.  Here are some my favorites:

BOYS

  1. St. George. Use old solid color tshirt to look like tunic. And/or carry a toy sword & shield or make a cardboard sword &; shield.
  2. St. Lawrence. Use dark solid t-shirt to look like a tunic.  Attach a cooling grill to the front of the costume or have the child carry the grill to represent St. Lawrence's faith.  He was the saint who told the men who were killing him by burning him to "turn me over, I'm done on this side."
  3. St. Christopher. Patron St. of Travelers.  Solid t-shirt tunic or robe. Carry a map or a stick with a travel bag attached to it.
  4. St. Stephen. White Robe/Tshirt tunic with brown cross on it.
  5. St. Patrick. Carry a bunch of green paper shamrocks or pin them to a shirt.
  6. St. Nicolas. Santa outfit or make a white beard out of cotton balls.
  7. St. Florian. Fireman Costume
  8. St. Fiacre. Gardener Costume with overall, gloves and a toy spade or toy shovel
  9. St. Isidore. Farmer overalls & toy shovel
  10. St. Joseph. Carry a toy hammer or toy saw
  11. St. Francis, Brown shirt/robe and a white dove made from paper for his shoulder.

GIRLS

  1. St. Kateri Tekakwitha.  Native American Costume. Use a solid brown t-shirt to look like a tunic.  Apply gold fringe or Native American looking ribbon to make it into a Native American costume. You could paint on Native American designs. You could also use brown paper bags to make a vest or headdress.  You can apply feathers from the craft store to the paper for the headdress.
  2. St. Cecilia. Patron Saint of Musicians. Child can carry a toy musical instrument
  3. St. Dorothy. Patron Saint of Gardeners. Solid Colored Robe or T-shirt. Carry a basket of fruit or flowers or a plant and/or toy shovel or toy rake.
  4. St. Elizabeth of Hungary. Use a Queen costume and add a basket of rolls and flowers.
  5. Joan of Arc. Knight Costume with skirt instead of pants. OR just a toy shield and toy sword. OR make a shield from posterboard & glitter on a cross.
  6. St. Lucy. White Robe & corona on head with white candles & greenery.
  7. St. Helena of the True Cross. Solid Color Robe/Tunic Dress and a Cross to carry.
  8. St. Mary, the Virgin Mother.  Baby Blue & White Robe.  Baby Doll wrapped in white cloth to carry.
  9. St. Theresa. The Little Flower.  A bouquet of flowers. 
  10. St. Martha. Carry a toy broom and/or wear an apron. 


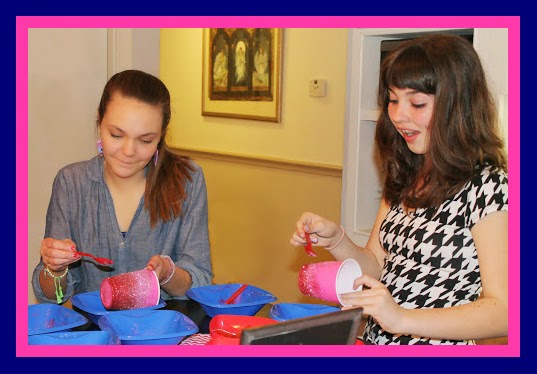
DAY OF THE DEAD.  For All Souls' Day, I take a papel picado banner, pan dulce (Mexican sweet breads), candles, calaveras (decorated skulls) and other Day of the Dead decorations to make a special display to talk about resurrection and our Christian belief in an afterlife.  My husband and I teach R.E. together and our religious education mentor, Mrs. Andrea Bryant, greatly enjoyed Day of the Dead decorations because their bright colors communicate simply the Christian belief of a joyous afterlife with God.  I don't spend much class time on All Souls' Day because I have to cover another lesson that day as well, but if I had more time, I'd consider having the kids color and cut out calaveras (decorated skulls) as a craft.  My family and some of our friends made some this year for our Day of the Day Party.  They were very fun and easy. If you'd like to try some, I recommend the ones HERE.   They aren't big projects by any means, but I do think the small touches make class more interesting for the students and give them positive associations with these Catholic holidays which is my goal.


WRITTEN BY ELDAROSE